


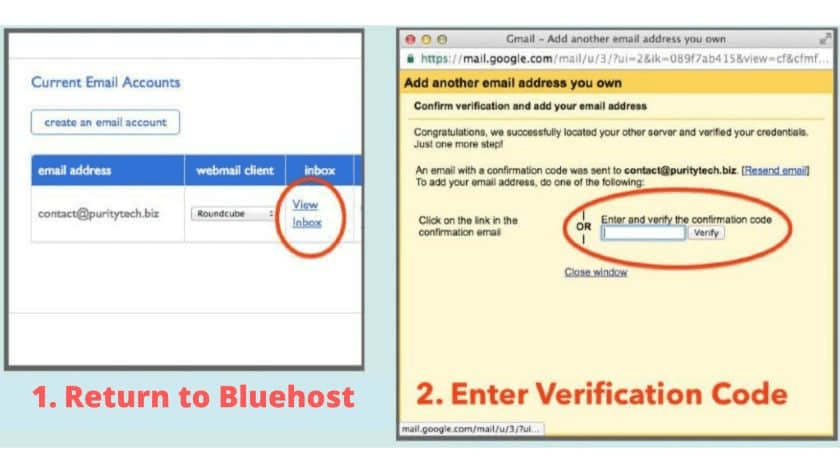
With all those options set, click “Add Account.” On the next screen, you’ll be asked if you want to be able to send email from your new professional email address – select “Yes” and hit “Next”! In the “POP server” box, make sure it says “mail.” For the other options: Enter the full professional email address you created with HostGator in the “username” box, then your password in the “password” box. The next screen will ask if you want to use Gmailify, we want the “Import Emails from My Other Account (POP3)” option then click Next Enter your professional email address in the pop-up and click Next Click the Accounts and Import tab, scroll down to the “Check Mail from Other Accounts” section, and click “Add a Mail Account” Log in to your Gmail account, click gear icon at the top right and then the “Settings” option in the drop-down menu Use Your Custom Domain with Gmail for Free Fill Out the Form with Your Professional Email Address and Password, choose the Unlimited Option to Keep All the Emails You Get, and click “Create Account! Log in to the HostGator Customer Portal and click the “Email Accounts” link under “Control Panel Setup Your Professional Email Address (HostGator) Why use Gmail instead of your hosting provider’s email client?.Why use a custom domain/professional email address instead of a generic Gmail?.Why Use a Custom Domain for My Email Address?.